
As a passionate video editor and an avid user of Adobe After Effects, I’ve always been fascinated by the power of visual storytelling. In my latest tutorial, I dove into a feature that many of my fellow After Effects users find incredibly useful: converting masks into shape layers. I’m excited to share with you the insights and step-by-step instructions from the tutorial, transforming them into a comprehensive blog post that you can refer to anytime.
The Why and How of Mask Conversion
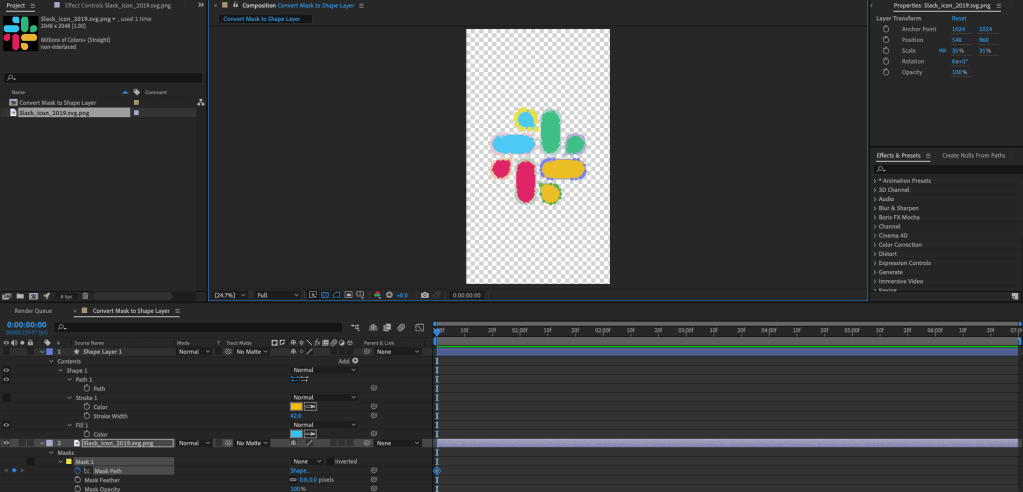
Imagine you’re working on a project in After Effects, and you’ve applied a mask to an image. Now, you’re faced with the need to convert this mask into a shape layer. Why would you want to do this? Well, shape layers offer a level of versatility and animation options that masks alone do not. They can be scaled, colored, and manipulated without any loss of quality, making them a powerful tool in your After Effects arsenal.
Step 1: Create a Random Shape Layer
The process begins quite simply. You’ll need to create a random shape layer and make a shape. This is your starting point, the canvas on which you’ll transfer your mask path.
Step 2: Copy Your Mask Path
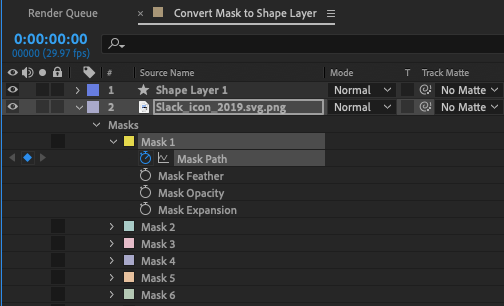
Next, navigate to the mask that you wish to convert. Highlight the mask path, and copy it. This is a crucial step, as you’re essentially copying the blueprint of your mask to be pasted onto your new shape layer.
Step 3: Paste to the Shape Layer Path
With your mask path copied, move up to your previously created shape layer. Find the path in the shape layer and paste the mask path directly onto it. It’s almost like magic, but you might notice something off at first—the shape may appear to be a different size.

Step 4: Adjusting for Scale
Don’t worry if the shape isn’t the right size initially. If you’ve scaled your image down at any point, this can affect the size of the pasted shape. The key here is to ensure that the image and the shape layer are scaled to the same size. Once they are, the shape should match the original mask perfectly.
Step 5: Customize and Animate
The final step is where your creativity comes into play. You can now change the color of your new shape layer and animate it to your heart’s content. The possibilities are endless, and you can bring your visual storytelling to life in ways that a simple mask could never achieve.
Wrapping Up the Tutorial
Throughout the tutorial, I aimed to provide a clear and concise guide to help you master this technique. Converting a mask into a shape layer in After Effects is a simple yet powerful skill that can elevate your projects to a new level.
Remember, practice makes perfect. Don’t hesitate to experiment with different shapes and animations. After Effects is a playground for the creative mind, and with each new skill you acquire, you unlock more of its potential.
I hope this blog post has been as informative and engaging as the tutorial itself. Stay tuned for more tutorials and insights, and keep pushing the boundaries of your creativity with After Effects.
