

As an avid content creator, I’ve always been passionate about sharing my knowledge and helping others enhance their video editing skills. In my latest Instagram tutorial, I dove into the world of Adobe Premiere Pro, focusing on a technique that can transform your graphics from static to stunning: adding motion blur. Today, I’m excited to bring you a comprehensive blog post that encapsulates the essence of that tutorial, packed with insights and step-by-step instructions to elevate your video projects.
The Magic of Motion Blur
Before we jump into the nitty-gritty, let’s talk about why motion blur is such a game-changer. Motion blur is that beautiful, natural effect you see when objects move quickly in real life or in high-quality films. It’s the slight streaking or blurring of an image in motion, and it’s crucial for adding realism and visual appeal to your graphics. Without it, your animations can look unnaturally crisp and jarring to the eye. As a video editor, if you’re not using motion blur in your Premiere Pro projects, you’re missing out on a simple yet powerful tool to make your graphics come alive.
Step 1: Embrace the Transform Effect
The journey to achieving perfect motion blur starts with the “transform” effect in Adobe Premiere Pro. This effect is your best friend when it comes to simulating realistic motion blur. Here’s how to get started:
- Drag and drop the “transform” effect onto your graphic clip in the timeline.
- Once applied, you’ll see a variety of settings you can adjust. But there’s one setting that’s particularly crucial for motion blur: the shutter angle.

Step 2: Crank Up the Shutter Angle
The shutter angle controls the amount of motion blur. In the world of video editing, a higher shutter angle results in more blur, mimicking a slower camera shutter speed. For maximum effect, you’ll want to set the shutter angle to its highest value, which is 360. This will give you that smooth, cinematic motion blur that can make all the difference in your graphics.
Step 3: Uncheck the Box
There’s a little trick in the transform effect that can trip you up if you’re not aware of it. Make sure to uncheck the “Use Composition’s Shutter Angle” box. By doing this, you’re telling Premiere Pro to use the shutter angle you’ve just set, rather than defaulting to the composition’s settings. It’s a small step, but it’s vital for achieving the look you want.
Step 4: Animate with Keyframes
Now that you’ve set up the motion blur, it’s time to animate your graphic. Add keyframes to the position or scale of your graphic to create the desired movement. As your graphic moves from point A to point B, the motion blur will kick in, giving it that smooth, flowing appearance.
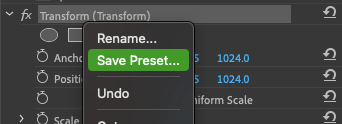
Pro Tip: Save Your Settings
Here’s a tip that will save you time and keep your workflow efficient: save your motion blur settings as a preset. Once you’ve dialed in the perfect amount of blur and have your keyframes just right, right-click on the effect in your effect controls panel and choose “Save Preset.” Name it something memorable, and the next time you need motion blur, you can apply your custom preset with a simple drag and drop.
Wrapping Up
Throughout the tutorial, I made sure to provide clear, concise instructions to ensure that you can easily follow along and apply these techniques to your own video editing projects. My goal is to empower you with the knowledge and tools to take your content to the next level. Remember, it’s these small details, like adding motion blur, that can significantly enhance the visual quality of your graphics and set your video editing work apart from the rest.
I hope this blog post has been as informative and engaging as the tutorial itself. Whether you’re a beginner or a seasoned pro, understanding how to effectively use motion blur in Adobe Premiere Pro is an essential skill that will elevate your video editing game. Now, go forth and create with confidence, knowing that you have the power to bring your graphics to life with the magic of motion blur.
